تأمینکنندگان
Before products can be added to the Lunch app, the restaurants that provide the food must be configured.
To add a new vendor, first navigate to . Here, all currently configured vendors for the Lunch app appear in a default Kanban view. To change to a list view, click the :icon:`oi-view-list` (list) icon in the top-right corner.
توجه
No vendors are preconfigured in the Lunch app, so all vendors must be added to the database.
To add a new vendor, click the New button in the top-left corner, and a new lunch supplier form loads.
Fill out the following fields on the vendor form:
اطلاعات تأمینکننده
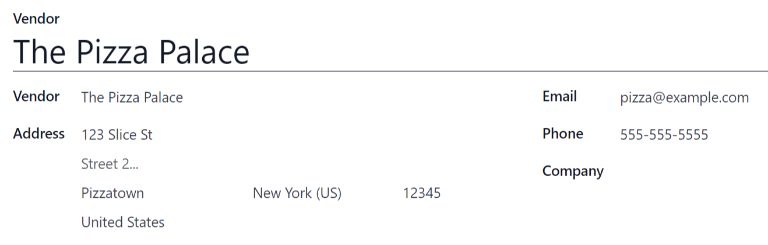
Vendor: enter a name for the vendor.
Vendor (beneath the line for vendor name): select the vendor from the drop-down menu. If the vendor has not already been entered in the system, type in the vendor name, and click either Create "new vendor name" to add them. Alternatively, click Create and edit... to create the vendor, and edit the vendor form. The vendor form allows for more detail, aside from the name, to be entered, such as contact information.
توجه
اگر انتخابی در فیلد کشویی تأمینکننده انجام شود، فیلد متنی تأمینکننده (بالا، برای نام تأمینکننده) با نام تأمینکننده انتخاب شده از منوی کشویی بهروز میشود.
The list of vendors that is presented in the drop-down menu is pulled from the Contacts application.
Address: enter the vendor's address in the various fields.
Email: enter the vendor's email.
Phone: enter the vendor's phone number.
Company: if this vendor is only available to a specific company, select the company from the drop-down menu. If this field is left blank, the vendor's items are available to all companies.
در دسترس بودن
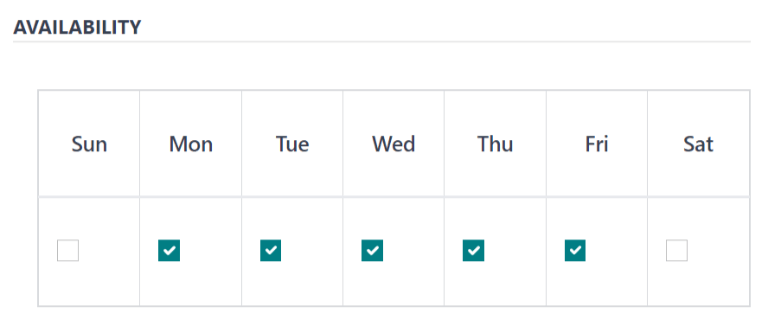
بخش در دسترس بودن یک جدول با دو ردیف دارد. روزهای هفته ردیف بالا را پر میکنند و ردیف پایین دارای چکباکسهایی است. کادر مربوط به هر روز هفتهای که تأمینکننده در دسترس است را تیک بزنید.
به طور پیشفرض، دوشنبه تا جمعه تیک خوردهاند.
سفارشها
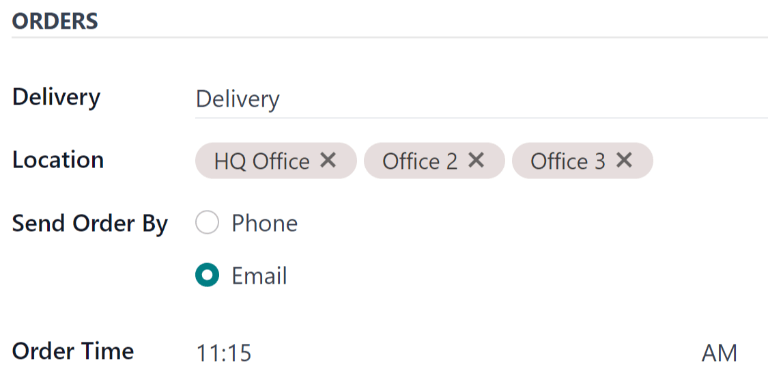
بخش سفارشها در فرم تأمینکننده، جزئیات مکانهایی که تأمینکننده برای آنها در دسترس است، علاوه بر نحوه و زمان ثبت و دریافت سفارشها را مشخص میکند.
Delivery: using the drop-down menu, select Delivery if the vendor delivers to the office, or select No Delivery if orders must be picked up.
Location: select which locations are able to order from this vendor. Multiple locations can be selected. If this field is left blank, all locations can order from the vendor.
توجه
یک مکان «دفتر مرکزی» به طور پیشفرض هنگام ایجاد پایگاه داده ایجاد میشود و برای انتخاب از لیست در دسترس است.
Send Order By: click the radio button to select how orders are sent to the vendor. The available options are Phone or Email.
Order Time: this field only appears if Email is selected in the Send Order By field. Enter the time that an order must be emailed for it to be accepted. Enter the time in the following format:
HH:MM. Then select either AM or PM from the drop-down menu, next to the time field.
افزودنیها
When ordering an item in the Lunch app, optional extra items, sometimes referred to as add-ons, can be shown. These can be configured in any manner that suits the products being offered.
به طور پیشفرض، سازمانیار سه نوع افزودنی را مجاز میداند که میتوان آنها را دستهبندی در نظر گرفت. به طور پیشفرض، نوع اول (یا دستهبندی) افزودنیها با برچسب «افزودنیها»، نوع دوم با برچسب «نوشیدنیها» و نوع سوم با برچسب «برچسب اضافی ۳» مشخص شده است.
مهم
هنگام پیکربندی افزودنیها، به خاطر داشته باشید که همه افزودنیهای پیکربندی شده برای هر آیتم ارائه شده توسط تأمینکننده ظاهر میشوند. این یعنی فقط آیتمهایی که برای همه محصولات تأمینکننده اعمال میشوند، باید اضافه شوند.
پیکربندی افزودنیها
اطلاعات زیر را برای هر یک از سه بخش اضافی موجود وارد کنید:
Extra (#) Label: enter a name for the type of extra, such as
Toppings. This can be thought of as a category.Extra (#) Quantity: select how the extras are selected. The options are:
None or More: select this if the user is not required to make a selection.
One or More: select this to require the user to make at least one selection.
Only One: select this to require the user to make only one selection.
افزودن افزودنیها
پس از پیکربندی برچسبها و مقادیر برای یک دستهبندی، افزودنیها را باید به صورت تکی برای هر دستهبندی اضافه کرد.
در پایین لیستی که در سمت چپ دستهبندی ظاهر میشود، روی افزودن سطر کلیک کنید. نام و قیمت را برای هر آیتم وارد کنید. اگر هزینهای وجود نداشته باشد، قیمت میتواند روی «۰.۰۰$» باقی بماند. این برای مواردی مانند قاشق و چنگال یکبار مصرف یا چاشنیها رایج است.
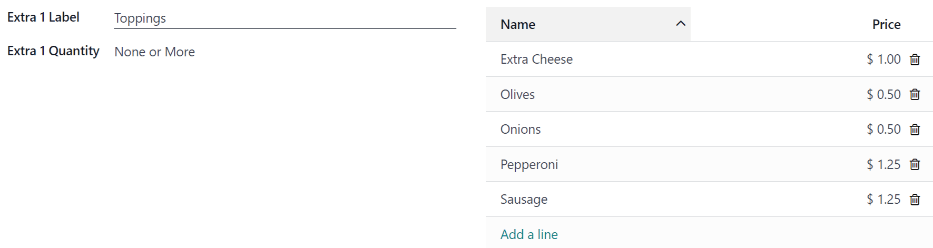
Example
برای یک پیتزا فروشی که فقط پیتزاهای شخصی ارائه میدهد، افزودنیهای آنها به شرح زیر پیکربندی شده است:
افزودنی اول برای تاپینگهای مختلفی که ارائه میدهند پیکربندی شده است. برچسب اضافی ۱ روی «تاپینگها» و مقدار اضافی ۱ روی هیچ یا بیشتر تنظیم شده است. سپس تاپینگهای مختلف با هزینههای مربوطه اضافه میشوند.
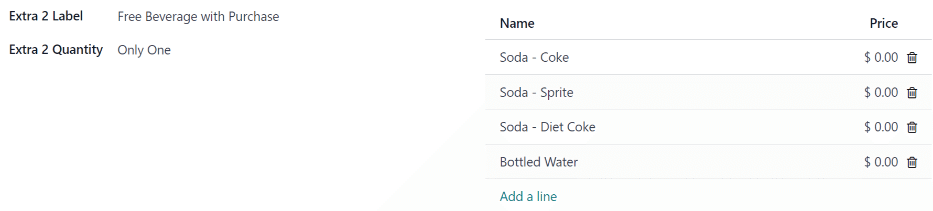
The pizzeria also offers a free beverage with any purchase. To set this up, the Extra
2 Label is set to Beverages, and the Extra 1 Quantity is set to Only
One. The various beverage choices are added, and the cost for each remains zero.