توافقنامههای سطح خدمات (SLA)
A service level agreement (SLA) defines the level of service a customer can expect from a supplier. SLAs provide a timeline that tells customers when they can expect results, and keeps the support team on target.
توجه
The SLA Policies feature is enabled by default on newly created Helpdesk teams.
برای غیرفعال کردن این ویژگی، یا ویرایش ساعات کاری، به بروید. روی یک تیم کلیک کنید تا صفحه پیکربندی آن تیم باز شود.
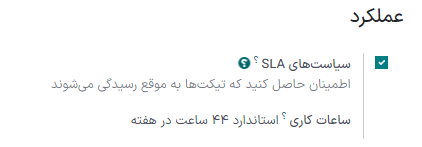
From here, scroll to the Performance section. To turn off the SLAs feature for the team, clear the SLA Policies checkbox.
ایجاد سیاست SLA جدید
برای ایجاد سیاست جدید، به بروید و روی جدید کلیک کنید.
به طور جایگزین، به بروید و روی یک تیم کلیک کنید. سپس، روی دکمه هوشمند سیاستهای SLA در بالای صفحه تنظیمات تیم کلیک کرده و روی جدید کلیک کنید.
On the blank SLA policy form, enter a Title and a Description for the new policy, and proceed to fill out the form using the steps below.
تعیین معیارهای سیاست SLA
بخش معیارها برای شناسایی اینکه این سیاست به کدام تیکتها اعمال میشود، استفاده میگردد.
فیلدهای زیر را برای تنظیم معیارهای انتخاب پر کنید:
توجه
مگر اینکه خلاف آن ذکر شده باشد، برای هر فیلد میتوان چندین انتخاب انجام داد.
Helpdesk Team: a policy can only be applied to one team. This field is required.
Priority: the priority level for a ticket is identified by selecting one, two, or three of the ⭐ (star) icons, representing the priority level on the Kanban card or on the ticket itself. The SLA is only applied after the priority level has been updated on the ticket to match the SLA criteria. If no selection is made in this field, this policy only applies to tickets marked as
Low Priority, meaning those with zero ⭐ (star) icons.Tags: tags are used to indicate what the ticket is about. Multiple tags can be applied to a single ticket.
مشتریان: در این فیلد میتوان مخاطبها یا شرکتهای خاصی را انتخاب کرد.
Sales Order Items: this field is available only if a team has the Timesheets app enabled. This allows the ticket to link directly to a specific line on a sales order, which must be indicated on the ticket in the Sales Order Items field.
Example
یک تیم پشتیبانی باید به مشکلات فوری مشتریان VIP در عرض یک روز کاری رسیدگی کند.
The new policy, titled 8 Hours to close, is assigned to the VIP Support team. It only
applies to tickets that are assigned three ⭐ (star) icons, which equates to an
Urgent priority level.
در عین حال، تیکتها میتوانند مربوط به مشکلات متعددی باشند، بنابراین این سیاست برای تیکتهایی با برچسبهای تعمیر، خدمت یا اضطراری اعمال میشود.
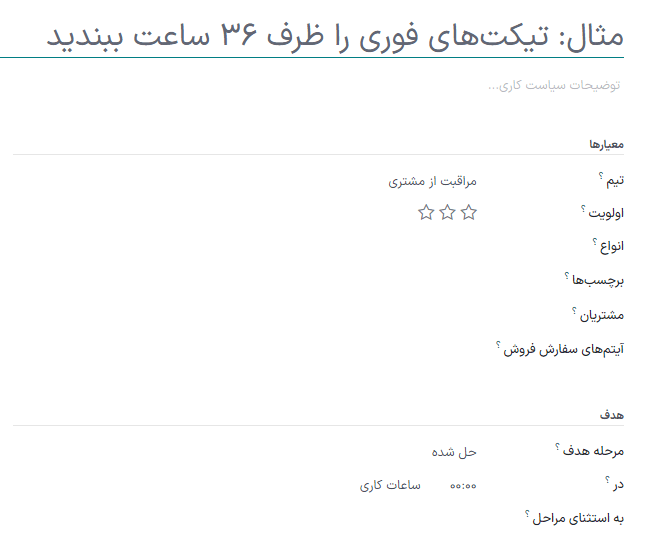
تعیین هدف برای سیاست SLA
A target is the stage a ticket needs to reach, and the time allotted to reach that stage, in order to satisfy the SLA policy. Any stage assigned to a team may be selected for the Reach Stage field.
Time spent in stages selected in the Excluding Stages field are not included in the calculation of the SLA deadline.
Example
An SLA titled 8 Hours to Close tracks the working time before
a ticket is completed, and would have Solved as the Reach Stage. Simultaneously, an
SLA titled 2 Days to Start tracks the working time before
work on a ticket has begun, and would have In Progress as the Reach Stage.
برآورده کردن مهلتهای SLA
As soon as it is determined that a ticket fits the criteria of an SLA policy, a deadline is calculated. The deadline is based on the creation date of the ticket, and the targeted working hours.
توجه
The value indicated next to the Working Hours field of an SLA policy is used to determine the deadline. By default, this is determined by the value set in the Company Working Hours field under .
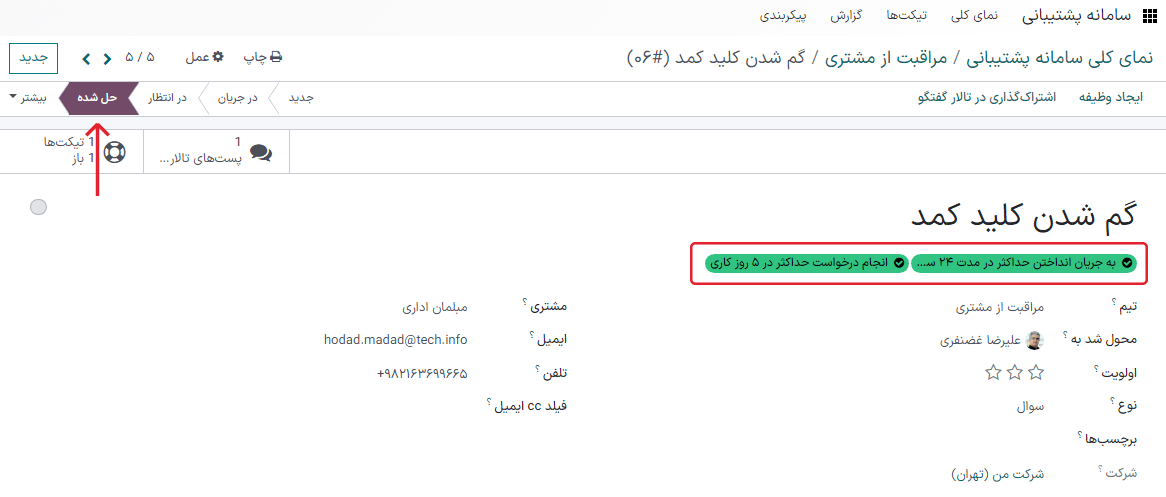
The deadline is then added to the ticket, as well as a tag indicating the name of the SLA applied.

When a ticket satisfies an SLA policy, the SLA tag turns green, and the deadline disappears from view on the ticket.
مهم
If a ticket fits the criteria for more than one SLA, the earliest occurring deadline is displayed on the ticket. After that deadline has passed, the next deadline is displayed.
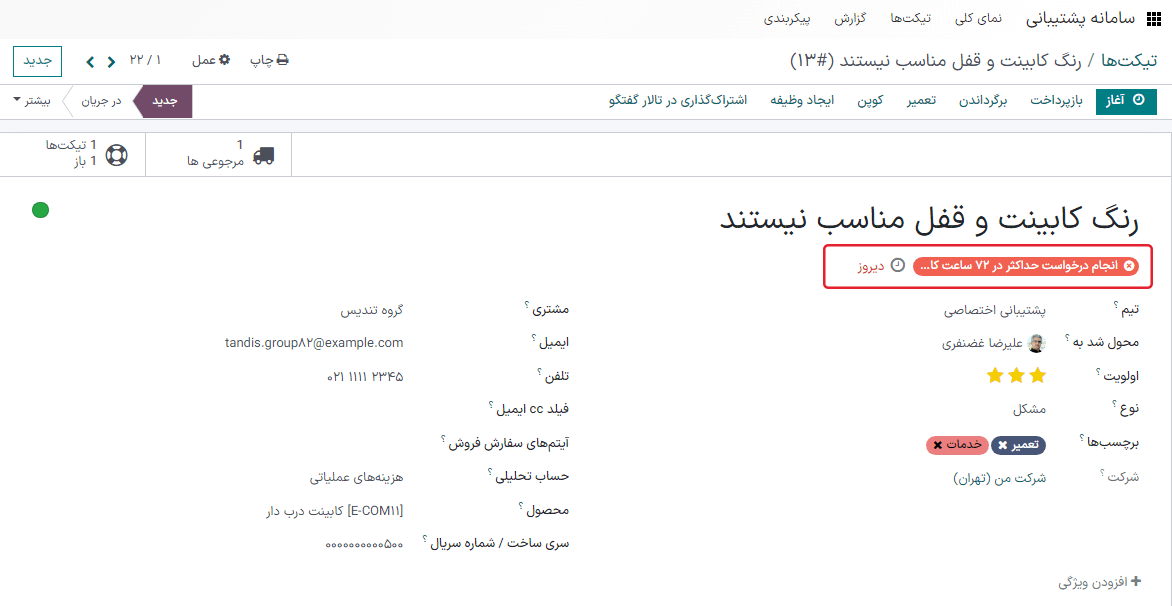
If the SLA deadline passes and the ticket has not moved to the Reach Stage, the SLA tag turns red. After the SLA has failed, the red tag stays on the ticket, even after the ticket is moved to the Reach Stage.
تحلیل عملکرد SLA
The SLA Status Analysis report tracks how quickly an SLA is fulfilled, as well as the performance of individual team members. Navigate to the report, and corresponding pivot table, by going to .
نمای پیوت
By default, the report displays in a Pivot view. Any SLA policies in the database with tickets that failed to fulfill a policy, are in progress, or have satisfied a policy are listed. By default, they are grouped by team and ticket count.
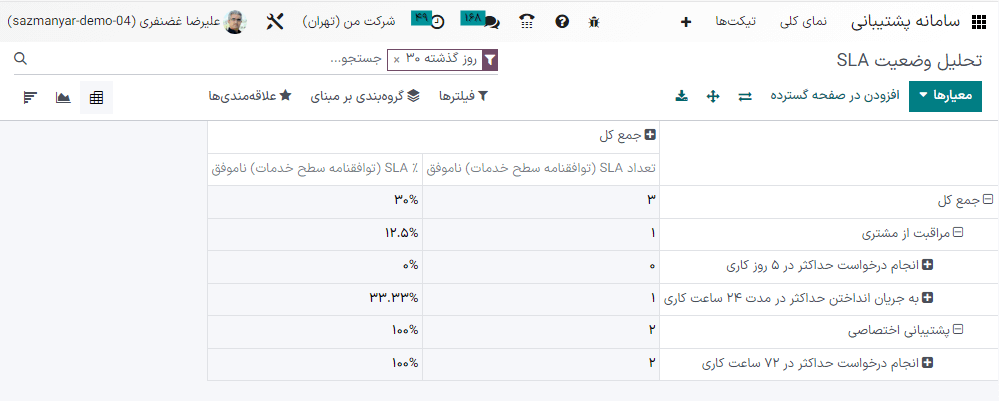
نمای پیوت دادهها را تجمیع میکند، که میتوان با افزودن معیارها و فیلترها آن را دستکاری کرد.
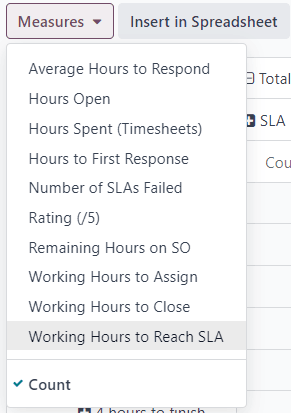
برای تغییر نمایش، یا افزودن معیارهای بیشتر، روی دکمه معیارها کلیک کنید تا یک منوی کشویی از معیارهای گزارشدهی باز شود و از گزینههای موجود انتخاب کنید.
Whenever a measurement is picked, a ✔️ (checkmark) icon appears in the drop-down menu to indicate that the measurement is included, and a corresponding new column emerges in the pivot table to show the relevant calculations.
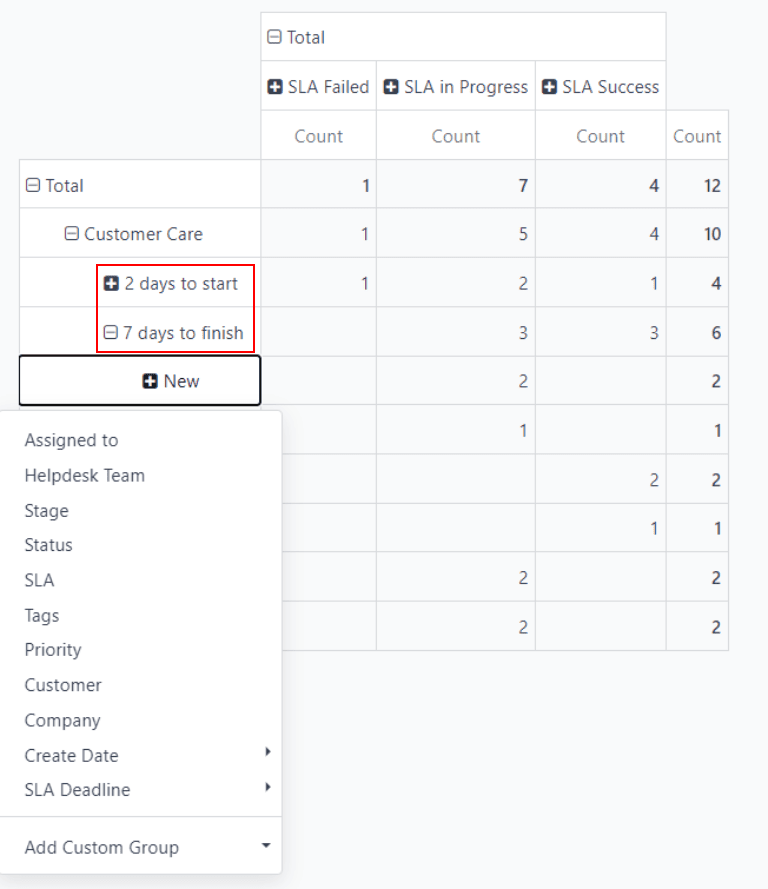
To add a group to a row or column, click the ➕ (plus) icon next to the policy name and then select one of the groups. To remove one, click the ➖ (minus) icon next to the policy name.
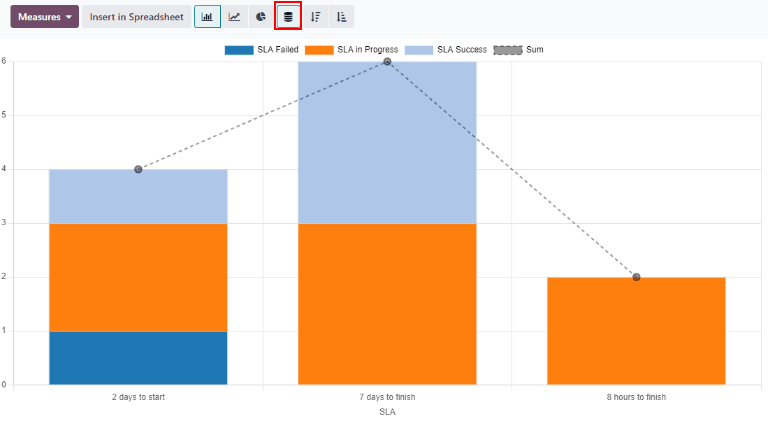
نمای نمودار
The SLA Status Analysis report can also be viewed as a Bar Chart, Line Chart, or Pie Chart. Toggle between these views by first selecting the Graph button at the top-right of the dashboard. Then, select the appropriate chart icon at the top-left of the graph.

نمودار میلهای میتواند با مجموعه دادههای بزرگتری کار کند و دادهها را در چند دستهبندی مقایسه نماید.
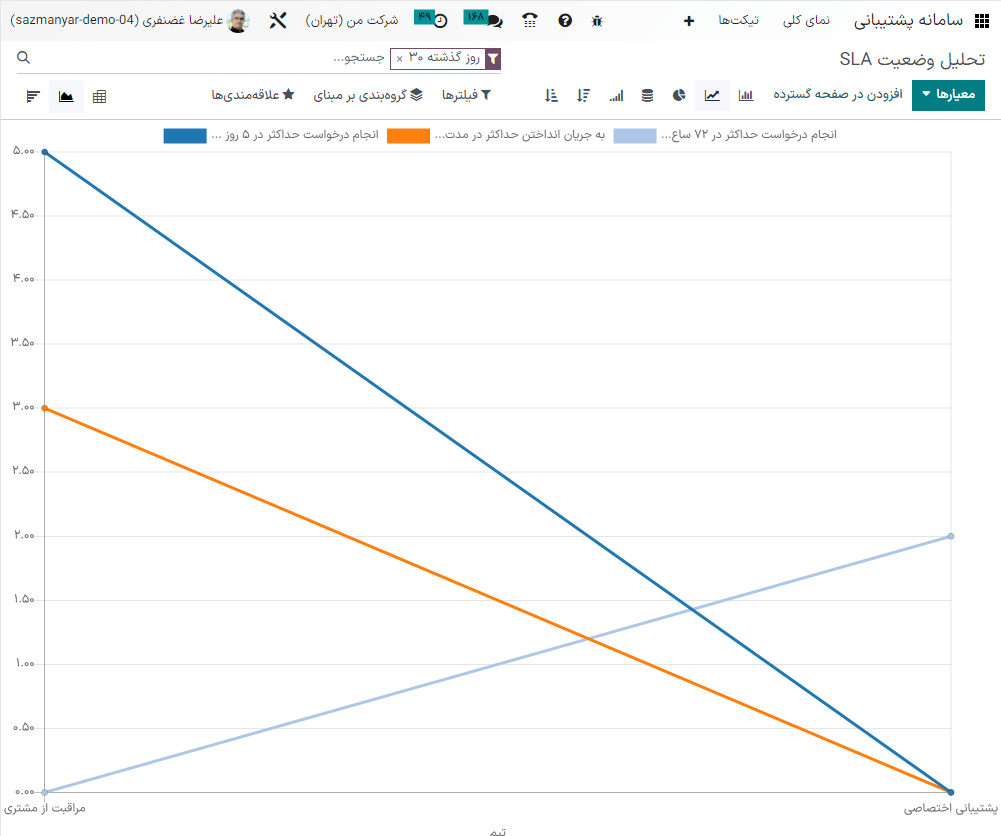
نمودار خطی میتواند روندهای داده یا تغییرات را در طول زمان تجسم کند.
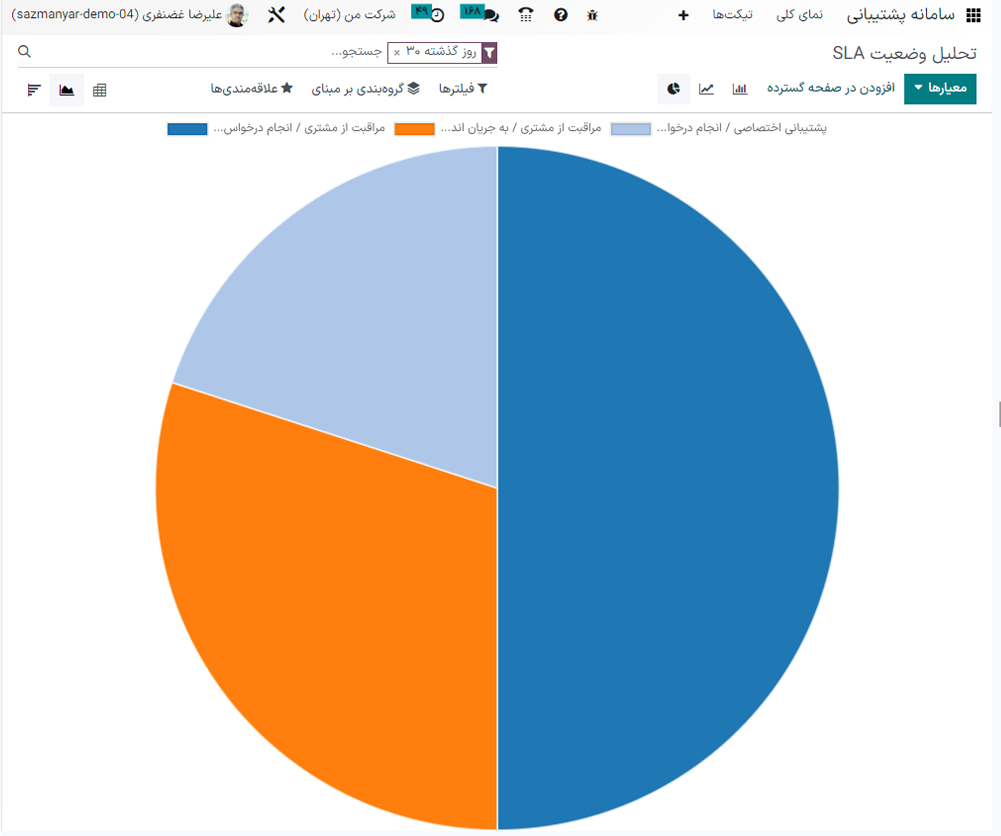
نمودار دایرهای دادهها را در بین تعداد کمی از دستهبندیها مقایسه میکند.
نکته
Both the Bar Chart and Line Chart views can be Stacked by selecting the Stacked icon. This displays two or more groups on top of each other instead of next to each other, making it easier to compare data.
نمای کوهورت
The Cohort view is used to track the changes in data over a period of time. To display the SLA Status Analysis report in a Cohort view, click the Cohort button, represented by (four cascading horizontal lines), in the top-right corner, next to the other view options.
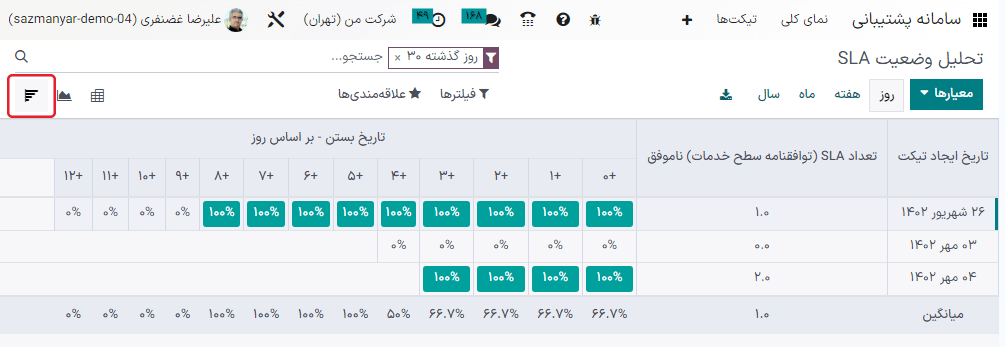
نمای کوهورت چرخه عمر دادهها را در طول زمان بررسی میکند.
همچنین ملاحظه نمائید